Showing posts with label Narrative. Show all posts

More New Spices

I ran out of dried mint a month ago, and I've been waiting to get another bag. I finally got the opportunity to visit my favorite Middle Eastern grocery, this week.


A huge bag of dried mint, for $3.00 ($20.00 worth, at a supermarket). Plus caraway, cardamom, and ginger root.

I'll buy spices in plastic bags, especially at these prices - but I hate storing spices in the bags, when I have this collection of empty spice jars. The jars are way more convenient to open, when I cook.

This is at least $50.00 at supermarket prices (except you can't get black caraway, anywhere). At Afghan Market in Concord, this was just over $10.00.

Unlike my last spice purchase, I know everything here. The black caraway is an essential in my chili and similar dishes - Cuban Style Black Beans, for instance. And the mint will go into a lot of dishes - including the Sesame Mint Rice.

A most satisfying afternoon shopping.

New Spices

After some urging by friends, I tossed some of my older spices. This week, I ordered some new ones, to replace a few that I ran out of recently - and to try some different ones.

Sent by Mark & Reese at Season With Spice, using USPS Express Mail. 3 days after placing the order, I was taking the picture.

Now, to find some new recipes. I am familiar with coriander and mustard. And I have a few curry recipes. Garam Masala I am just learning - and the other two will be completely new.

So, Google is your friend, we'll see what happens.

Don't Eat Raw Taro Leaves

As you cook your favourite recipes, you may use many exciting and exotic ingredients. Some vegetables that you may cook, you may be curious about what they taste like by themselves, maybe raw. Sometimes, as you prepare your favourite recipe, you may nibble on raw vegetables. Why not? Raw veggies are a great snack.

Not so, for raw taro.

Don't eat raw taro, and especially don't let kids nibble on raw taro leaves. See WikiPedia: Taro, or Taro.co.nz: "Cooking", for more information. You may, alternatively, read my real life tale in Nitecruzr's Better Health And Living: Taro - Toxic When Raw.

>> Top

Use Chili Peppers, and Hot Spices, Carefully

I love spicy foods. Now, compared to what you can get in Thailand, my food is not terribly spicy, but one Habanero pepper can pack a wallop. Even a jalapeno or serrano pepper can cause pain. Your mileage may vary here.

When I cook spicy foods, like Chuck's Kick In The Seat Of Your Pants Chili, or maybe Chuck's Memory Of Thailand Mango Salad (with fresh jalapeno peppers), I take precautions. If you are going to use my recipes, I advise the same, based upon experience. The hot peppers (Habanero), and spices (Cayenne), can cause burning - seriously - if you're not careful. I like to joke around - a lot - but I am not joking here.

  • When you clean and chop raw peppers, don't put your face in line with what you're chopping or cleaning. A squirt of juice or a seed from a jalapeno, in your face or your eye, will interrupt your cooking activities for more time than it takes to clean and chop it carefully.

  • When you're cooking something with spicy vegetables, or hot spices in general, and you take the lid off the pan, use common sense. Don't stick your face into the fumes. Take the lid off with the opening pointing away from your face.

  • If any discomfort is felt in eyes, stop immediately what you're doing, and flush eyes with water. Never rub eyes with hands until following morning.

  • Wearing contact lenses may make your eyes especially sensitive to the fumes given off by the spices / hot peppers as they cook. Beware.

  • Wash hands thoroughly, under running water, after preparing chili peppers. I use a kitchen brush with plenty of detergent, and scrub each finger on both hands, and under the fingernails. Plan on 5 minutes of scrubbing.


If you ignore my advice, you'll find out one day what I'm talking about. Or you can laugh at me for being a wimp. Your choice.

Slicing a Mango

A mango is a pretty odd fruit. I remember the first time I was given one, to eat. It's huge, and juicy sweet. But you have to get thru the skin, which is tough, and not too tasty. Once you do that, you get a couple bites of sweetness, then you end biting into this huge rock that wrecks your teeth. OUCH.

WTF?

So what use is it?

Well, you'll find several websites telling you how to peel, and slice, a mango. But the ones I found provided only the basic information. Once you actually try it, it's a guessing game, and you're on your own. So, I made my own instructions.

First, make sure the mangoes are nice and ripe. Typically, you will want to ripen them for several days, or even a week or more.

When you get them at the store, they're probably hard as a rock. Make sure all the ones you buy are equally hard, so they will all ripen at the same time.

Bring them home from the store and put them in a brown paper bag, one about twice the volume of the mangoes. Roll the end up nice and tightly, and set the bag aside for a few days. When they're ripe, you should be able to poke them gently, and feel your finger leave about a 1/4" depression. Too ripe is better than not ripe.

Now that they're ripe, take a look at one first, while it is whole.

  • Put the mango on a plate. Let it lie there naturally, with the stem end to your left, and the tip end to your right.
  • Look at the mango, from above. See the oval shape, with the stem at one end? What you're looking at is a half inch or so of juicy sweet fruit, surrounding a huge seed. The seed is oval too, and roughly the shape of the outer fruit. Remember this shape.
  • Look at the mango, from either end. You'll see that it is not round, in crossection - it's more of a flattened oval. That's the shape of the seed too. Remember this shape.
  • Soak the mango in some nice anti-bacterial dish washing detergent. Just like soaking dishes - a drop or two of detergent, fill a container with water, get a good head of foam, and drop the mango in there. Let it soak for an hour or so, take it out and rinse thoroughly.
  • Take a plain potato peeler, and peel the skin off the mango, just like off a potato. This will be a sticky job, so organise as much as possible. Get all the needed tools out and on the counter before you start, and plan on ending up with your hands covered in mango juice.
  • Take a freshly peeled mango, and put it in the palm of your hand, with the stem end towards your wrist, so it's flat in your hand (remember looking at the flat shape from above, in the step above?).
  • Take a nice sharp utility knife, and cut thru the flat side of the mango, in the middle, towards the palm of your hand. Don't worry - you will NOT cut thru the seed - your hand is safe. Do this in two or three places up and down the flat side. This should give you an idea how deep the seed is. In most cases, you'll get maybe 1/4 way thru one side before hitting the seed.
  • Now that you know where the seed is, you know how deep to cut into the mango. Start at the end opposite the stem (remember looking at the mango from above, in the step above?), and cut towards the stem, and parallel to the wide flat side of the seed. Just run the knife down the flat side of the seed, to the stem end. You now have 1 piece of mango, oval, maybe 1/2" deep, the size of one side.
  • Turn the mango over, and repeat.
  • Next, cut a couple narrow strips of fruit off the sides of the seed.
  • Put the 4 pieces in a bowl, and the seed in another bowl. Next, peel and slice another, in the same way. Don't just throw the seeds away.

When you finish peeling and slicing each mango, go outside with the bowl of seeds. There will be plenty of fruit sticking to the seeds, that you will never get with a knife, but you can with your teeth. Just don't try inside your house, cause this is messy. Think sucking the cherry or plum off the seed, except you won't be able to get your mouth closed with the seed in it. So you'll have mango juice everywhere, which is why I said
Don't try this inside the house.

But the sweetest part of the mango is next to the seed.

Now, my instructions are for those folks who live in the USA, where mangoes might be on sale for 50c each, if you're lucky; in some cases you could pay up to $2.00 each. In Australia or Thailand, where they sell for maybe 10c each, my bud Bob provides this picture tutorial ThaiPan: One way to Prepare a Mango. He's a bit more casual with the knife, and with the precious fruit.

>> Top

Don't Throw Out The Leftovers

I know everybody who's been cooking for a while has probably knows this already, so my apology for boring you. You folks who are just starting out need to know this though.

When you cook a vegetable, broccoli or cauliflower for instance, you trim the vegetable. You'll use the main portion of the vegetable for your main dishes, to keep the cooking consistent, and make the recipe manageable. But 75% of what you don't use in the main recipe can, and should, be saved for later.

With potato leek soup, for instance, you put maybe 60% of the leek into the soup. Now I don't know of any use for the hairy root, so that goes in the trash. But the green part of the leek is perfect, chopped, as a garnish for Peanut Stew, or well chopped and raw, in Couscous Salad, or Taboulli.

And when you cook broccoli or cauliflower, you'll serve the flowery end of the broccoli or cauliflower first. But take the stalk, put it in an airtight refrigerator dish, and save it for a few days. When you need a quick meal, take the stalk, peel it lightly (remove the outer edge, the toughest knots where the various branches split from the stalk, and cut off the end which may have gotten a bit tough from the air), and slice it crossways into 1/4" thick medallions. A little lemon juice, cumin, and / or garlic makes that pretty good, microwaved til tender. Or put the slices into Peanut Stew.

Those of you with crock pots probably put everything into a stew, on principle. OK, my apologies for boring you here. The rest of us can learn other tricks though.

The Making Of 200 Stuffed Mushrooms

Day 0 - Involvement
All I wanted to do is prove that men can cook too, so I volunteered to work on preparations for the party.

"What can I bring?" I asked. Sue looked at her list.

"How about stuffed mushrooms?".

Well, I've made stuffed mushrooms a few times, and never been too impressed. But they are easy enough to make - just snap the stems off, chop up the stems, add a few veggies and spices, stuff the mixture into the empty (stems removed) caps, and bake. An easy project.

"Sounds good to me. How many shall I bring? A couple dozen or so?".

"Well, we're planning on 50 people. Better make it a few more. Say 200."

Whoops.

Well, I'm not one to back down, so I thought why not? And the fun began.

Day 1 - Purchase and Preparation
So how do you get 200 mushrooms? That's a lot of mushrooms. Thanks to Lois, also in the party planning committee, I found my way to Lunardi's Grocery in Walnut Creek.

Inside I went, to the vegetable department, and found a grocery clerk. And 10 minutes later, I left the store with a 10 pound case of fresh mushrooms.

Did I say this already? That's a lot of mushrooms.

First, came the task of cleaning. Well, the largest container that I have, that was suited for this task, was a salad spinner. Which held a couple pounds at a time. And I quickly developed a routine, born of necessity.

  • Half fill the empty salad spinner with dirty (and boy were they) mushrooms.
  • Fill with water, agitate til water turns brown.
  • Drain mushrooms from salad spinner.
  • Replace slightly clean mushrooms in salad spinner, and repeat process.
  • As each quantity of mushrooms became so clean that the water drained off them was clear, agitate the drainer well to ensure that all of the water drained off them, then dump the clean mushrooms into a Tupperware container.
  • Repeat the above process, with another 2 pounds or so.

Once I had filled 3 large Tupperware containers with nice clean, dry mushrooms, I sealed the containers, put them in the refrigerator, and called it a day.
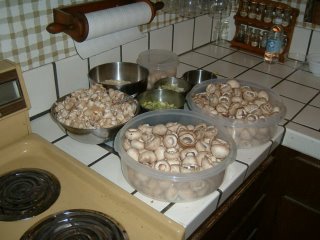

BEFORE


  • Empty mushroom caps.
  • Mushroom stems.
  • Bread crumbs.
  • Leftover mushrooms (my patience ran thin after 200).
  • Chopped veggies.


Day 2 - Cooking
The second day started with my realisation that my old recipe - One Dozen Easy Stuffed Mushrooms - was nowhere to be found. The reason why I started this blog, in the first place, was that I had grown tired of my recipe box - which was an index card holder stuffed full of documents that were not all on index cards. Looking it up on the web is so much easier, and more fun.

So back to the web I went, and, from a Gohoo of:

recipe stuffed mushrooms garlic onion cheese

I rounded up half a dozen or so interesting recipes. From the recipes, I observed:

  • Proper proportions.
  • Additional ingredients.
  • Cooking techniques.

The issue of cooking techniques, in particular, was quite enlightening. I learned to (DOHH) cook the spices / stems / veggies mixture BEFORE adding it to the bread / cheese, and stuffing the mushrooms. So that's why the ones I made always fell apart, and why the veggies were always so hard when the mushrooms were eaten.

The idea of letting the mushrooms cook until the pan was full of water was, likewise, a new idea to me. Previously, I had thought that shrunken, watery mushrooms meant that they had been cooked for too long, and at too high a heat. So my previous attempts would end up with semi-cooked, yet leathery, mushrooms.

The whole Internet experience was well worth the time. Obviously, you already know that, cause you're here. Unless you're here for the laughs, in which case welcome to Chuck's Kitchen. And, if you're ever in the Martinez area, and feel the need for spiritual refreshment, you could do a lot worse than dropping by Martinez UMC, which is where this story started.
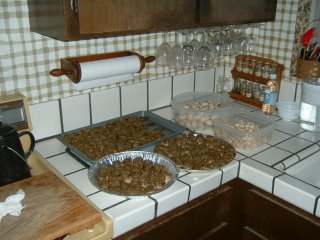

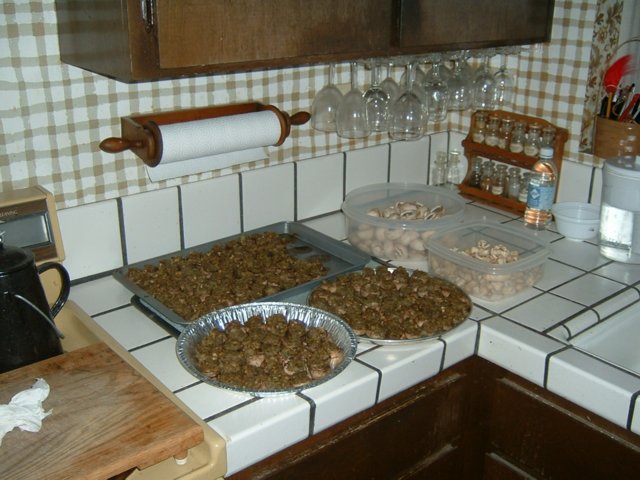
AFTER


  • 3 pans of cooked and drained stuffed mushrooms (some taste testing was done, you will count MAYBE 150 I dunno).
  • Leftover caps.
  • Leftover stems.

I didn't buy enough bread, and ran out of crumbs, after stuffing 175 or so, so I had a few mushrooms left over. The leftovers were cooked the following week, when I wrote my second recipe using normal quantities.